Friday, November 30, 2012
Google Nexus 7 Manual
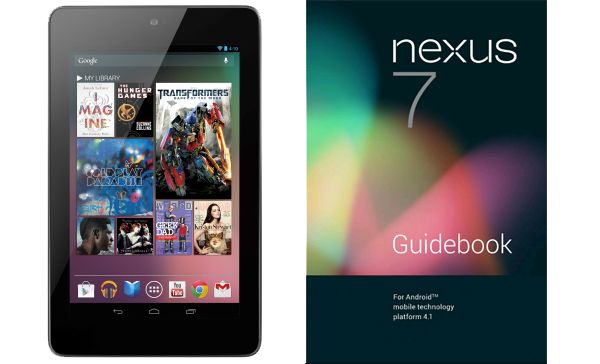
Google Nexus 7 Manual: Download Asus Nexus Tablet User Guide - How To Turn on & sign in ? To turn on your Nexus 7, press the Power button on the right edge near the top for a few seconds, then release it.
The first time, you’ll see a Welcome screen.
- To choose a different language, touch the menu.
- To continue, touch Start and follow the instructions.
When prompted, sign in using the email address and password for your Google Account. If you don’t have one yet, go ahead and create one. An email address that you use for any of the following counts as a Google Account:
- Gmail
- YouTube
- Google Apps
- AdWords
- Any other Google product
When you sign in with a Google Account, all the email, contacts, Calendar events, and other data associated with that account are automatically synced with your tablet. if you have multiple Google Accounts, you can add the others later.
How to Charge the battery ?
The printed Quick start Guide that comes with Nexus 7 contains basic operating instructions for your new tablet. The battery may not be fully charged at first. It’s a good idea to fully charge it as soon as you can.
Connect the micro usb cable to Nexus 7 and to the charging unit, and the charging unit to a power outlet:
IMPorTAnT: use the charging unit and micro usb cable that come with your Nexus 7. other charging units and usb cables may charge more slowly or not at all
You’re in control
When you opt in to Google Now, you’re also turning on location reporting and location history. Google Now also uses location information provided by Google’s location service and GPS, if those are currently turned on. Google’s location service must be turned on for Google Now to work. Google Now also uses data from other sources, such as your data in Google products or in third-party products that you allow Google Now to access. For example, your tablet’s synced calendar may include entries from non-Google calendar products. For example, if you have a synced calendar entry for a dentist appointment that includes the dentist’s address, Google Now can check traffic and suggest when to leave. And if you have searches stored in your Web History, Google Now can also show cards based on sports scores, flight status, and so on.You’re in control. You can choose exactly which cards you’d like to see, adjust the details of what they display, and adjust your privacy settings. For more information about Google Now and your location information, see “Chapter 4, Make search personal,” on page 26. Page 26 u can download pdf below.
Download Asus Nexus Tablet User Guide pdf

Nokia Asha 202 quick manual/user guide
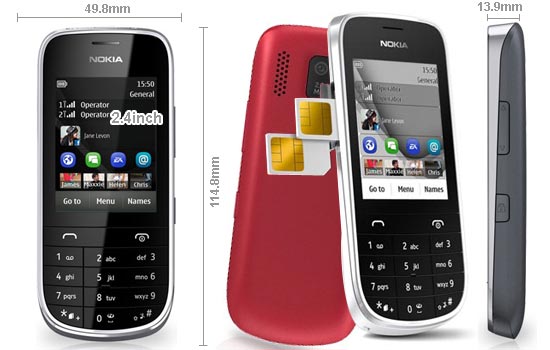
Nokia Asha 202 quick manual/user guide - How to Update phone software using your PC ? Update your phone software with the Nokia Suite PC app. You can also back up the photos and other stuff in your phone to your computer. You need a compatible PC, a highspeed internet connection, and a compatible USB cable to connect your phone to the PC. To get more info and to download the app, go to www.nokia.com/support.
How to Update phone software using your phone ?
You can update your phone software wirelessly. You can also set your phone to automatically check forupdates.
You can only update your software when using the SIM in the internal SIM holder.
Select Menu > Settings and Device > Device updates.
1. To check if there is an update, select Current sw details.
2. To download and install an update, select Downl. device sw, then follow the instructions shown on the
phone.
The update may take several minutes. If you encounter problems, contact your network service provider.
Check for updates automatically ?
Select Automatic SW update, then set how often to check. Your network service provider may send updates over the air directly to your phone. For more info on this network service, contact your network service provider.
Back up content to a memory card ?
Want to make sure you won't lose any important files? You can back up your phone memory to a compatible memory card.
1. Select Menu > Settings > Sync & backup.
2. Select Create backup.
3. Select what you want to back up, then select Done.
Restore a backup
Select Restore backup
And now you can download user manual below, if you can read to full content.
Download Nokia Asha 202 User Manual Guide(pdf)
Nokia Asha 306 quick manual/user guide
Nokia Asha 306 quick manual/user guide - How Charge the battery over USB ? Battery low, but you don't have a charger with you? You can use a compatible USB cable to connect to a compatible device, such as a computer. To avoid breaking the charger connector, be careful when connecting or disconnecting the charger cable.
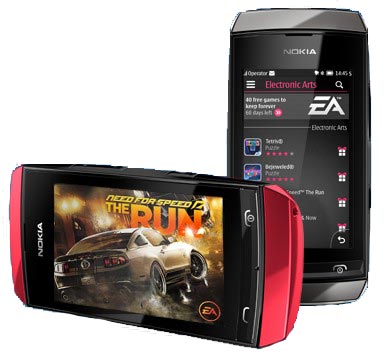
Learn how to start using your phone.
Keys and parts
1 — Earpiece
2 — Screen
3 — Call key
4 — Microphone
5 — Charger connector
6 — Micro-USB connector
7 — Headset connector (Nokia AV connector 3.5 mm)
8 — Volume up/Zoom in key
9 — Volume down/Zoom out key
10 — Lock key
11 — End/Power key
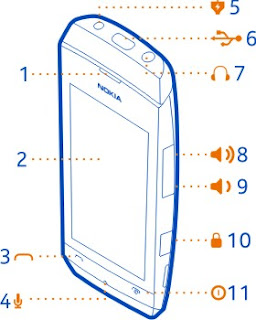
12 — Camera lens. Before using the camera, remove the protective tape from the lens.
13 — Memory card slot
14 — Loudspeaker

Insert or remove a memory card
Use only compatible microSD cards approved by Nokia for use with this device. Incompatible cards may damage the card and the device and corrupt data stored on the card.
Your phone supports memory cards with a capacity of up to 32 GB. You can insert or remove the memory card without switching the phone off.
Insert a memory card :
1 Use your fingernail to open the cover of the memory card slot.
2 Push the memory card in with the contact area face up until it locks into place.
3 Close the cover of the memory card slot.
Remove the memory card :
Important: Do not remove the memory card when an app is using it. Doing so may damage the memory card and the device and corrupt data stored on the card.
1 Open the memory card slot cover.
2 Push the card in until it's free, then pull it out.
3 Close the cover
Charge the battery :
Your battery has been partially charged at the factory, but you may need to recharge it before you can witch on your phone for the first time. If the phone indicates a low charge, do the following:
1 Connect the charger to a wall outlet.
2 Connect the charger to the phone.
3 When the phone indicates a full charge, disconnect the charger from the phone, then from the wall outlet.
You do not need to charge the battery for a specific length of time, and you can use the phone while it is Charging. If the battery is completely discharged, it may take several minutes before the charging indicator is displayed or before any calls can be made.
If the battery has not been used for a long time, to begin charging, you may need to connect the charger, then unplug and reconnect it.
Ok there, if you read full this content manual user, you can download it below.
Download Nokia Asha 306 quick manual/user guide (pdf)
Acer Iconia Tab A110 quick manual/user guide
Acer Iconia Tab A110 quick manual/user guide - How to Sign in to or create a Google account ? If you have Internet access, your tablet allows you to synchronize information with a Google account. During the start-up process, you may create or sign in to an account, which will be used to synchronize your contact list, email, calendar and other information. If you do not yet have Internet access, or do not want to use this feature, then tap Skip.
Important: You must sign in to a Google Account to use Gmail, Google Talk, Google Calendar, and other Google Apps; to download applications from Google Play; to back up your settings to Google servers; and to take advantage of other Google services on your tablet.
If you want to restore existing settings from another device with Android 2.0 (or later) installed, you must sign in to your Google account during setup. If you wait until after setup is complete, your settings will not be restored.
Note: If you have multiple Google accounts, such as separate accounts for personal and business contacts, you can access and synchonize them from the Accounts settings section. See "Multiple Google accounts" on page 40.
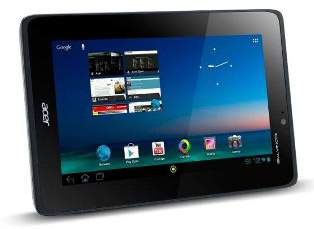
Getting to know your tablet
Features and functions
Your new tablet offers leading, easy-to-access multimedia and entertainment features. You can:
- Connect to the Internet.
- Access your email while on the move.
- Keep in touch with your friends via your People and social networking applications.
Product registration
When using your product for the first time, it is recommended that you immediately register it. This will give you access to useful benefits, such as:
- Faster service from our trained representatives.
- Membership in the Acer community: receive promotions and participate in customer surveys.
- The latest news from Acer.
Hurry and register, as other advantages await you!
How to register
To register your Acer product, please visit www.acer.com. Click Registration and follow the simple instructions.
You can also register directly from your tablet by tapping the Registration icon. After we receive your roduct registration, you will be sent a confirmation email with important data that you should keep in a safe place.
To turn on your tablet, press and hold the power button until the tablet vibrates. Wait a moment for your tablet to bootup. You will then be asked some questions before you can use your tablet.
To start, tap to select your language and country, then tap Start. Follow the rest of the instructions as they are displayed
Note: If the tablet’s screen turns off, it has entered sleep mode. Briefly press the power button to wake it up. For more information, see "Waking your tablet" on page 19
Ok, If you to read full content, you can download user manual pdf below.
Download Acer Iconia Tab A110 quick manual/user guide (pdf)
Nokia Lumia 510 quick manual/user guide
Nokia Lumia 510 quick manual/user guide - How to Insert the SIM card ? Important: This device is designed to be used with a mini-UICC SIM card, also known as a micro-SIM card only. A micro-SIM card is smaller than the standard SIM card. Use of incompatible SIM cards may damage the card or the device, and may
corrupt data stored on the card. Do not use SIM cards that have been modified to fit the micro-SIM slot. To replace a standard SIM card with a micro-SIM card, contact your service provider. Do not attach any stickers to the card.
Insert the SIM card :
1. Place your fingernail in the gap on the lower right edge of the phone, and carefully
lift and remove the back cover
2. If the battery is inserted, lift it out.
3. Make sure the contact area is facing down, and insert the card.
4. Line up the battery contacts, and insert the battery.
5. Replace the back cover.
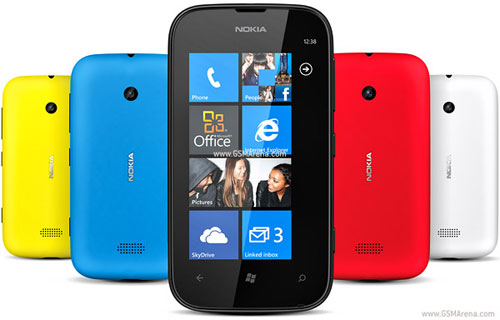
Learn how to start using your phone.
Keys and parts
1 — Connector for headphones and loudspeakers (3.5 mm)
2 — Earpiece
3 — Proximity sensor. Do not cover, for example, with protective film or tape.
4 — Volume key
5 — Power/Lock key
6 — Camera key
7 — Microphone
8 — Back key
9 — Start key
10 — Search key
11 — Micro-USB connector. Used also to charge the battery.
12 — Camera lens
13 — Loudspeaker

Also can too using USB charging when a wall outlet is not available. Data can be transferred while charging the device. The efficiency of USB charging power varies significantly, and it may take a long time for charging to start and the device to start functioning.
1. First connect the USB cable to the computer, then to your phone.
2. When the battery is full, first unplug the USB cable from your phone, then from the computer.
If the battery is completely discharged, it may take several minutes before the charging indicator is displayed or before any calls can be made.
If you to read full, you can download user manual below.
Download Nokia Lumia 510 quick manual/user guide (Pdf)
Thursday, November 29, 2012
LG Nexus 4 quick manual/user guide
LG Nexus 4 quick manual/user guide - Insert a SIM card >> Before you start using your phone, you may need to insert your Micro SIM card. If no card is installed, the message “No SIM card” ap pears on the phone’s lock screen
The SIM card tray is located on the left side of the phone below the volume button. The eject button is a small hole just above the tray door. To install a new Micro SIM card:
1. Insert the SIM ejection tool that comes with the phone (or a thin pin) into the eject button hole, and push firmly but gently until the tray pops out.
2. Remove the tray and place the micro SIM card inside it, with the contacts out and the angled corner to the right. There is only one possible way to fit the card snugly into the tray.
3. Carefully reposition the tray in the slot and push it gently back into the phone.
TIP: Your phone’s IMEI identification number is on the SIM card tray. You may need this number later to identify your phone for service purposes. Write down the IMEI number or take a photo of the label on the product box
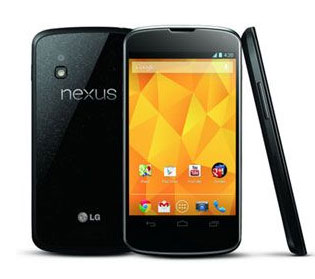
Table of contents
- Get started
- Explore your phone
- Use the Phone app
- Use the keyboard
- Try some apps
- Use Google Now & Search
- Accessibility
- Wireless & network settings
- Device settings
- Security settings
- Personal, account, & system settings
- Appendix: Hardware reference
Set up your phone
The first time you turn on the phone, you’ll see a Welcome screen.
- To choose a different language, touch the menu.
- To continue, touch Start and follow the instructions.
When prompted, sign in using the email address and password for your Google Account. If you don’t have one yet, create one.
An email address that you use for any of the following counts as a Google Account:
- Gmail
- YouTube
- Google Apps
- AdWords
- Any other Google product
When you sign in with a Google Account, all the email, contacts, Calendar events, and other data associated with that account are automatically synced with your phone. If you have multiple Google Accounts, you can add the others later.
Ok, If you want to read full LG Nexus 4 quick manual/user guide, you can download below.
[Download LG Nexus 4 quick manual/user guide Pdf]
Samsung Google Nexus 10 quick manual/user guide
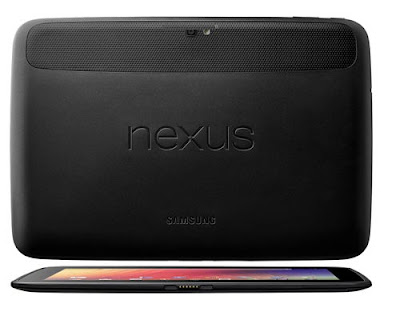
Samsung Google Nexus 10 quick manual/user guide - Samsung Google Nexus OS 10 comes using the latest Android 4.2 Jelly Bean. Google Nexus 10 has a touch screen measuring 10.1 inches with a very high resolution of 2560 x 1600 pixels (300ppi) resolution Retina screen beats Apple's new iPad that only has a resolution of 2048 x 1536 (264ppi).
Samsung Google Nexus 10 is manufactured by Samsung, and is powered by the Samsung Exynos chip 5 with a dual core 1.7GHz processor and 2GB of RAM. Nexus 10 is also equipped with a 5 megapixel main camera, 1.9 megapixel front camera, Wi-Fi, NFC and 9000mAh capacity battery.
Google Nexus 10 will be available in two versions namely 16GB and 32GB.
Google, Android, Gmail, Google Maps, Chrome, Nexus 10, Google Play, YouTube, Google+, and other trademarks are property of Google Inc. A list of Google trademarks is available at http://www.google.com/permissions/guidelines.html. Samsung and the Samsung logo are trademarks of Samsung. All other marks and trademarks are properties of their respective owners. The content of this guidebook may differ in some details from the product or its software. For best results, make sure you’re running the latest Android system update. To check, go to Settings > System > About tablet > System updates. All information in this guidebook is subject to change without notice.. For online help and support, visit support.google.com/nexus.
Why use a Google Account?
A Google Account lets you organize and access your personal information from any computer or mobile device:
1.Use Google Play. Google Play brings together all your favorite content in one place: movies, TV shows, books, music, magazines, apps, and more. When you sign in with your Google Account, you can reach any of this content from any of your devices – as long as you have a network connection. You can also shop for more in the Google Play store.
2.Synchronize and back up everything. Whether you draft an email, add an event to your calendar, or add a friend’s address, your work gets backed up continuously by Google and synchronized with any computer where you use the same Google Account.
3.Access from anywhere. Check your latest calendar, email, text messages, or social stream, no matter what computer or mobile device you’re using.
4.Keep your stuff secure and available. Google works round the clock to protect your personal data from unauthorized access and to ensure that you get it when you need it, wherever you need it.
5.Simplify shopping. You can connect your Google account with Google Wallet, which makes it easy to purchase music, books, apps, and more on Google Play and other online stores.
6.Use other Google services. Your Google Account also lets you take full advantage of other Google apps and services that you may want to use, such as Gmail, Google Maps, Navigation, Google Play, YouTube, Google Talk, Messaging, and more.
Use & customize the lock screen
You can add widgets to the top of the lock screen and swipe between them. Lock screen widgets let you scan recent Gmail messages, Calendar entries, and other app content without unlocking your screen.
To set or change the type of lock, see Set screen lock.
Add a widget to the lock screen
1. In portrait mode, swipe right across the upper part of the screen until you see the Plus icon. In landscape mode, swipe right from the left side of your screen
2. Touch the Plus icon. If prompted, enter your PIN, pattern, or password. A set of the available widgets appears. Apps that support lock screen widgets can add their own widgets to this set.
3. Touch the widget you want to add. You can add up to five widgets to your lock screen. To move between them, swipe across the top of the screen in portrait mode, or across the left side of the screen in landscape mode.
To Read Full Samsung Google Nexus 10 quick manual/user guide, you can download it below.
Subscribe to:
Posts (Atom)